Archive for category Electronics

Tesla Model 3 imperfections

UPDATED 2 December 2019:

Since this was written I’ve bought a 2nd Model 3 (for myself; it’s red with dual motors). Below, I’ve added comments [in brackets like this] on things that have changed since June 2018. There have been many software updates and improvements.

ADDED 3 August 2018:

We’ve had the car for a month now. There’s one really nice thing about it that I completely didn’t expect (maybe I should have).

Every morning, you start with a full “tank of gas”. 

Because you charge at home, the car is fully charged every morning. That’s enough for 5 or 6 hours of driving – far more than we ever do in a single day (except for one or two road trips each year – there are Superchargers for that, but we haven’t used one yet, so I’ll ignore that here).

This means that, effectively, you never need to even think about buying gas. The car is “full” every morning, and never runs out during the day.

This is an amazing and unexpected benefit. The time saved seems small at first, but those 15 minute out-of-your way stops add up. And the routine worry “can I get there without buying gas?” simply never comes up.

Once the $35,000 model is on the market, other car companies are going to have a big problem. For most people, buying any other sedan in that price range is just going to feel…stupid.


Yesterday (2018-06-27) we took delivery of my wife’s new Tesla Model 3.

It’s blue, with every possible option at the time – the long range battery, self-driving software (to be delivered), 19″ wheels, etc. But not the performance or dual motor stuff; those weren’t yet announced when Tesla was ready to deliver it.

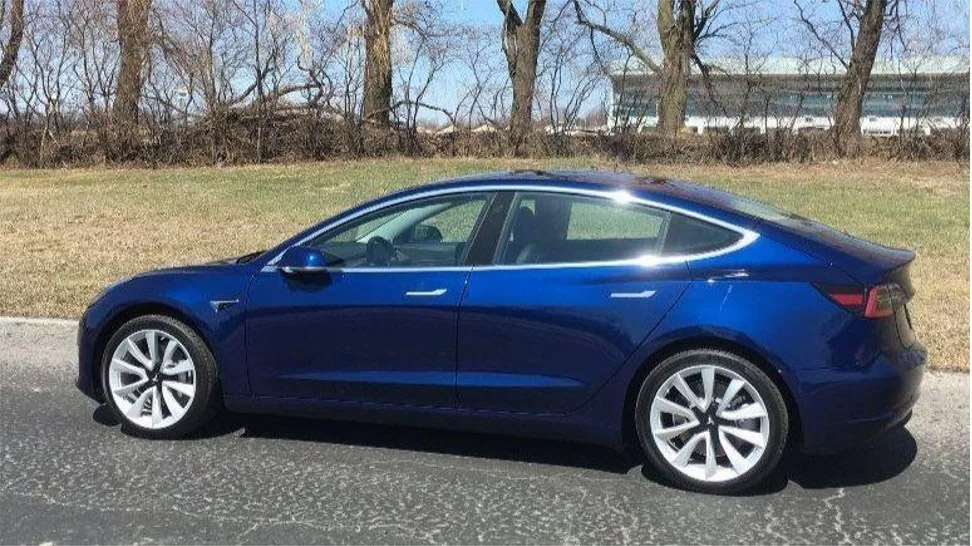
Not our car – but looks just like it

We waited two years to get it – she placed a deposit for it a couple hours before the unveiling, less than 10 minutes after Tesla opened the website for orders.

So far she’s driven it for about 2 miles, and me for about 80.

My initial impression is absolute delight – it’s a fantastic car. It’s comfortable. It looks great inside and out. It handles wonderfully. It’s far quicker than anything I’ve ever owned (and I’ve owned two turbocharged sedans and two Mazda Miatas – 1990 and 2008 – and this is the standard, non-performance version).

I won’t talk about the unique control layout (plenty of others have written about it) except to say it takes all of 15 seconds to “get used” to driving with it. (Except for remembering how to open the glovebox – you have to click on the screen.)

It is, of course, utterly silent. The only thing you hear is the tires against the road, unless the A/C fan is on (or the audio system, which is truly excellent).


That said, it’s not, of course, perfect.

For one thing, any car as new and revolutionary as this is bound to have some things that just haven’t had time to be fully polished, from a design viewpoint.

And, it was built when Tesla was at peak “production hell” on the Model 3, trying to ramp output past 5000 cars/week. It’s naturally difficult to vastly increase the quantity of production while maintaining quality at the same time, and I fully expected at least minor issues.

So far, with one major exception (the GPS didn’t work – see below; it’s fixed now), I’ve been pleasantly surprised. Based on my car (a sample of one), Tesla has succeeded in prioritizing the things that matter most – the car is solid and well put-together, with absolutely no rattles or loose bits.  Everything related to fundamental function – tires, suspension, motors, brakes, steering, handling, doors, windows, wipers, lights – works absolutely perfectly, with zero design or manufacturing issues.

There are issues – but they’re all niggles and minor things (again, except for the broken GPS).

Below, listed by the date I discovered them, is my list of imperfections on the car. I’m listing them here (a) because lots of people seem interested and (b) to let Tesla know about them, so they can fix them in future cars.

So far, none of them make me regret buying the car for a moment – I’d do it again in a flash. (Full disclosure: I’m a Tesla shareholder.)

2018-06-27 (day of delivery)

Design issues

  • Trunk lining is quite thin, doesn’t stay in place well. Maybe they tried too hard to save weight. [My newer Model 3 from December 2018 didn’t have this issue.]

Manufacturing issues

  • Damaged plastic cosmetic cover on left hood hinge (on inside of hood; not clear why these covers are even needed) [Store removed it; promised eventual replacement] [Newer car didn’t have these parts at all – they were unnecessary in the first place.]
  • The GPS on my car doesn’t seem to work. It thinks it’s in northern California all the time (it’s actually in the suburbs of Boston). The car updates it’s position as I drive, I think based on the wheels spinning and turning (could be inertial), but only relative to where it thinks it started from. Tesla delivery people said it’ll “sync up” with the correct location after a few miles of driving, but after 78 miles it hasn’t. (I suspect store folks knew something was wrong but didn’t want to deal with it on delivery day. Maybe I’m being unfair.) UPDATE: This fixed itself about 4 days later. Tesla support called back and told me this was a known software bug, but the car fixes itself once it hasn’t been driven for about 16 hours. [Newer car didn’t have this issue.]
  • Battery cover in the frunk is a bit loose on the right side – not enough clips or something. [Newer car didn’t have this issue.]

2018-06-28

Design issues

  • Dome light LED PWM rate is too low (noticeable flicker is too low)
  • Dome light takes too long to go out after pressing the button (too much dramatic slow fade)
  • “Walk Away Lock” should be part of the Driver Profile (instead of global). [It is, now. Fixed issue.]
  • Phone charging dock has no adjustment for phone case thickness. My phone doesn’t fit without taking it out of the case. (I expect aftermarket fixes for this, but they shouldn’t be needed) [There are indeed aftermarket solutions, for example https://www.helloskyline.com/collections/all/products/case-friendly-dock-adapter-for-tesla-model-3, which works well.]
  • There’s no way for an owner to enable someone else (like me, the husband) to use their phone to start the car, except by emailing Tesla to ask them to do it manually. Should be possible in the owner’s online Tesla account. (Car can be started with the key card, however.) [This is “fixed”, sort of, by me logging into the Telsa app on my phone using my wife’s username/password. Then I can drive her car without a key. It’s not a great solution (sharing passwords!) but it’s good enough.]
  • Car defaults to charging to 90% maximum (to extend LiIon battery life). That’s fine (and you can disable it to allow 100% charge), but the car should explain it better – I had to call and ask.
  • There’s a strip of rubber-like material around the bottom of the driver’s seat, just below the more normal plastic material above that strip. Feeling the rubbery stuff blind for the first time (while driving), I thought there was grease or something yucky there left from manufacturing. Poor choice of material. [Didn’t notice this problem on the newer car.]
  • A printed Owner’s Manual should really be included with the car (it’s online as a PDF)
  • No way to search the built-in Owner’s Manual, or even to scroll thru the whole thing in sequence without going back to the menu for each tiny section. (It’s pretty useless, which is why I had to download the PDF. OTOH, I seem to be the only person on the planet who actually reads Owner’s Manuals. I do skip the warnings, at least.)

Manufacturing issues

  • “T” logo illumination on charging port isn’t even (rightmost 5% of logo remains dark) [Newer car didn’t have this issue.]
  • “T” logo on hood is not quite centered (either that or the license plate holder isn’t). [Newer car didn’t have this issue.]
  • Weird (very minor) imperfection in display screen – it’s not dirt. Here’s a photo: [Newer car didn’t have this issue.]

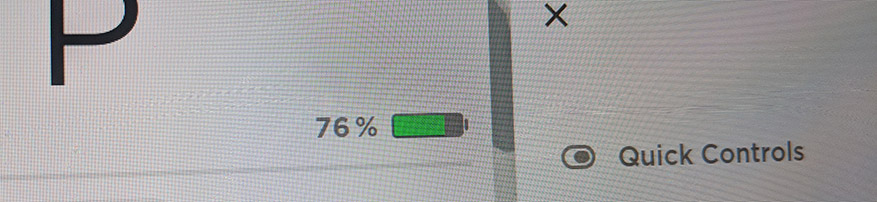
Ignore the beat patterns and color fringing – those are camera artifacts. It’s the smudges in the middle I’m talking about.

Bonus

Here’s a video of a spider crawling around on the rear view camera:

2019-06-30

Software issues

  • The charging cable is normally latched in, and is released by a solenoid when you press a button on the cable end.  Except  when the car is locked – then the release button is disabled. But the release button doesn’t work if the car has been charging for a “long” time – even if the car isn’t locked. The only way I’ve found to re-enable the release button is to open a car door – this seems to wake something up. I haven’t figured out exactly how long “long” is – it’s something > than 30 minutes, and <= reaching full charge. Pretty clearly a software bug.

2019-07-07

More than a week later. Haven’t found a single new thing to add to this list. I’m impressed.

2019-08-11

The car has 1700 miles on it now, and it’s first scratch (my fault when parking – it’s really minor).

Somehow the more I drive it, the more I like it. The car is just “stupid good”.  It feels like a magic, silent, carpet. (If that makes any sense.)

A few more imperfections – all software issues (some of these are from my wife – it’s her car):

Software issues – from the wife

  • She feels very strongly that the car should never lock itself when in our own garage. (Even if she’s not carrying her phone.) I don’t feel so strongly, but it seems this would be easy to do in software (don’t lock based on GPS or WiFi SSID). [This is fixed now – the auto-lock is a per-driver setting now, not a per-car setting.]
  • The “car rolls backward on steep hills” (without the brake on). I think she’s used to automatic transmissions that try to “creep” forward whenever the brake isn’t on – except for very steep hills, this prevents the car from rolling back, and that if the Telsa was in “creep” mode (there is one), it’d act the same. Still, given how smart the car is, it seems silly that it rolls backward when in Drive – the car should just automatically prevent that with the brakes, unless in Reverse or Neutral. [Fixed now – there’s a setting that automatically applies the brakes whenever the car comes to a stop. The brakes release instantly when you press the accelerator. Very nice solution.]
  • She’d like an option to make the font much bigger on the screen. She can’t read anything without reading glasses (but she can drive without them).
  • It was hard to figure out how to turn off “Christmas mode” (an Easter Egg).

Software issues – from me

  • Car doesn’t warn when there’s traffic in your blind spot (when changing lanes). My other car has “BLIS” (Blind Spot Information System) that blinks the side mirror (and beeps) when your turn signal is on but there’s traffic in that direction. [Partly fixed – the car beeps and shows a warning on the main screen. There’s still no warning light on the side mirror, which would be better.]
  • The voice recognition doesn’t seem to understand anything I ask it.  Things like “Directions to Home”, “Navigate to Home”, “Navigate to <address>”, “Open the glovebox”, etc. Each time it transcribes what I said correctly, then says it doesn’t understand and “Try again”. (I haven’t found anything useful that it does understand.) To be fair – I’m used to Google Assistant (a high bar), which handles all of this fine. (Given that Tesla uses Google Maps, I don’t see why they can’t partner with Google to do voice recognition, too.) [Still a problem as of late 2019. Why it can’t just hand off queries to Google Assistant, I have no idea. My phone is vastly better at these things.]
  • Autopilot doesn’t drive smoothly. It’s too aggressive about maintaining distance from the car in front – unless a collision is imminent, it ought to be more patient and allow the distance to gradually open/close to the targeted distance, instead of braking/accelerating as hard as it does. [99% fixed now.]
  • A lot of useful warnings seem to appear only on the screen. When I’m driving, I don’t have time to look at the screen and read them. It should say something.

2019-08-14

Software feature suggestion

  • Not really an “issue”, but a feature suggestion. When parking in tight spaces the Model 3 notices nearby objects, chimes, and shows the distance to them on the screen. Better yet would be to automatically switch to the camera view showing the closest object (the car in the next spot, lamppost, whatever). Then the driver could easily see whether the car will fit on it’s current path. This would have saved me a scratch. Given that the cameras and sensors are already there, this seems easy to implement.

Check back later – I’ll add more things here if and as I discover them.

AoA sensor first prototype

I don’t see anybody selling an angle-of-attack sensor for FPV RC aircraft, so I’m making my own.

Here’s the first (quite crude) prototype:

AoA sensor prototype

It’s nothing more than a hall effect sensor inside a hollow tube (the black plastic spacer) with a magnet glued onto it. It’s held by the red plastic block with a hole drilled thru it.

The other end of the tube has a crude weathervane attached (the counterweight needs more work).

It seems to work reasonably well:

I’d feed the output into an ADC on a PIC.

The whole thing is too loosey-goosey for flight – this was just a prototype to see if the idea works.

Now I’m trying to figure out how to make a flightworthy version. Maybe this would be a good first 3D printer project?

Improved W4ZCB Latching Continuity Tester

Here’s a very simple low-voltage, low-current latching continuity tester circuit. The probe voltage is only ~ 49 mV and probe current is 1/2 mA maximum, so it’s safe for testing almost any board without risk of damaging something.

It’s a slightly improved version of Harold Johnson, W4ZCB‘s circuit published some years ago. (Not sure when; I found it here.)Improved_W4ZCB_Contunity_Beeper

R1/R2 and R3/R4 are voltage dividers; comparator U1 (an LM2903) turns on the beeper if the resistance between the probe leads is less than about 25 ohms.

I added C2 to make it latching; otherwise it’s very scratchy. The LM2903 is a smaller part than the original LM339, and I changed R4 from the original 10k ohms to 47k, to drop the continuity threshold from about 50 ohms to 25.

I used a TMB12A05 buzzer for LS1; these are available on eBay for about 20 cents each (quantity 10). Any small buzzer that buzzes by itself (with an internal oscillator) will probably work.

D1 and R5 just provide a power-on LED; you can omit them.

It’ll run on anything from about 3 to 15 volts (with the probe voltage about 1/100 of that); most any small-signal PNP transistor can be used for Q1.

This was drawn with DipTrace, which I’m experimenting with. So far I like it a lot – the user interface is far more intuitive than Eagle.

Webcam with privacy shutter & mute

Another business idea – this time a simple one.

Today the BBC has an article about “webcam hijackers” who blackmail people (mostly young women) with remote access trojans that grab webcam video.

I don’t get it. Why do almost no webcams come with a physical privacy shutter – just a sliding piece of plastic?

The right way to do this is a knob that turns a cam and slides a shutter in front of the lens.

It should have four positions:

  • Off – shutter blocks lens, cam opens a switch that electrically disconnects the microphone
  • Audio only – shutter blocks lens, cam closes mic switch
  • Video only – shutter away from lens, cam opens mic switch
  • On – shutter away from lens, cam closes switch

How hard is that, really?


Hey: VCs often say that good ideas are a dime a dozen. Mine go even cheaper than that. If you use this idea to make money, I’d like 0.5%. Of the equity in your company, or the profits. Or something. If that’s too much (or too little), fine – whatever you think is fair. This is a request for a gift, or reward – it is not a legal obligation. You’re free to use this idea and pay me nothing. If you can live with yourself that way.

Remove all comments from C and C++ source code

At the moment I’m struggling with Microchip’s new “Harmony” framework for the PIC32. I don’t want to say bad things about it because (a) I haven’t used it enough to give a fair opinion and (b) I strongly suspect it’s a useful thing for some people, some of the time.

Harmony is extremely heavyweight. For example, the PDF documentation is 8769 pages long. That is not at all what I want – I want to work very close to the metal, and to personally control nearly every instruction executed on the thing, other than extremely basic things like <stdlib.h> and <math.h>.

Yet Microchip says they will be supporting only Harmony (and not their old “legacy” peripheral libraries) on their upcoming PIC32 parts with goodies like hardware floating point, which I’d like to use.

So I’m attempting to tease out the absolute minimum subset of Harmony needed to access register symbol names, etc., and do the rest myself.

My plan is to use Harmony to build an absolutely minimum configuration, then edit down the resulting source code to something manageable.

But I found that many of Microchip’s source files are > 99% comments, making it essentially impossible to read the code and see what it actually does. Often there will be 1 or 2 lines of code here and there separated by hundreds of lines of comments.

So I wrote the below Python script. Given a folder, it will walk thru every file and replace all the .c, .cpp, .h, and .hpp files with identical ones but with all comments removed.

I’ve only tested it on Windows, but I don’t see any reason why it shouldn’t work on Linux and Mac.

from __future__ import print_function
import sys, re, os

# for Python 2.7
# Use and modification permitted without limit; credit to NerdFever.com requested.

# thanks to zvoase at http://stackoverflow.com/questions/241327/python-snippet-to-remove-c-and-c-comments
# and Lawrence Johnston at http://stackoverflow.com/questions/1140958/whats-a-quick-one-liner-to-remove-empty-lines-from-a-python-string
def comment_remover(text):
    def replacer(match):
        s = match.group(0)
        if s.startswith('/'):
            return " " # note: a space and not an empty string
        else:
            return s
    pattern = re.compile(
        r'//.*?$|/\*.*?\*/|\'(?:\\.|[^\\\'])*\'|"(?:\\.|[^\\"])*"',
        re.DOTALL | re.MULTILINE
    )
    
    r1 = re.sub(pattern, replacer, text)
    
    return os.linesep.join([s for s in r1.splitlines() if s.strip()])


def NoComment(infile, outfile):
        
    root, ext = os.path.splitext(infile)
    
    valid = [".c", ".cpp", ".h", ".hpp"]
    
    if ext.lower() in valid:
           
        inf = open(infile, "r")

        dirty = inf.read()
        clean = comment_remover(dirty)

        inf.close()
        
        outf = open(outfile, "wb") # 'b' avoids 0d 0d 0a line endings in Windows
        outf.write(clean)
        outf.close()
        
        print("Comments removed:", infile, ">>>", outfile)
        
    else:

        print("Did nothing:     ", infile)

if __name__ == "__main__":
    
    if len(sys.argv) < 2:
        print("")

        print("C/C++ comment stripper v1.00 (c) 2015 Nerdfever.com")
    
        print("Syntax: nocomments path")

        sys.exit()
        
    root = sys.argv[1]
    
    for root, folders, fns in os.walk(root):

        for fn in fns:
    
            filePath = os.path.join(root, fn)
            NoComment(filePath, filePath)
    

To use it, put that in "nocomments.py", then do:

python nocomments.py foldername

Of course, make a backup of the original folder first.

Why is computer RAM disappearing?

For almost 30 years, roboticist Hans Moravec has been maintaining a great database of historical computer benchmarks going all the way back to 1891 (even before Hollerith tabulators).

This can be used to make nice plots showing Moore’s Law like this one (source XLS here):

2015-06_Moravec_MIPS


But – here is something way more interesting.

The graph below plots, for each historical machine, the ratio of RAM (megabytes) to MIPS. So a machine with the same bytes of RAM as instructions/second rates as 1. One with 10x more bytes of RAM than instructions it can execute in a second rates as 10, etc.

I think of this ratio as “seconds” – if each instruction can access one byte, then the ratio gives the number of seconds needed to access all the RAM. (Of course this is a rough measure, as architectures differ, but good enough to give interesting results).

Here’s what I get:

2015-06_Moravec_Seconds

Look at that! 

These are real historical machines with the given installed RAM (not how much RAM the machine could address, but the amount the machines actually had installed).

I’m just plotting the ratio of installed RAM to execution speed – it has nothing to do with price (except insofar as price may have affected buying decisions).

The ratio of RAM to machine speed has been steadily dropping. Why?

I remember a rule of thumb, probably from the 1980s, that a practical computer typically has about 1 second of of RAM – that is, a typical machine is fast enough to access all its memory in about 1 second.

This made sense at the time based on the idea that, in a command-line driven system, one second was about as long as users were willing to wait for a response. Longer was too slow, and shorter didn’t gain much.

But this graph is illuminating. The only explanation I can think of is that with the gradual transition from batch computing (many minutes is an acceptable run time), to interactive command lines (seconds) to GUIs (tens or hundreds of milliseconds), the ratio of RAM to MIPS has been steadily dropping.

But if that’s correct, I’d expect more in the way of a step function.

I suspect it’s something else, and that it’ll keep going. Something more interesting. But what?

Hewlett Packard > Agilent > Keysight … WTF?

What a way to ruin a great brand. For no apparent reason at all.

They could have called it “Pewlett Hackard”. Heck, they could have called it “Tektronix”. (Those guys in Beaverton seem to have no use for that name anymore.)

The monkeys are running the henhouse. (Or, um, something like that.)


Oh, and…get off my lawn!

Saleae Logic Analyzer

I’ve had this thing in my drawer for 2 years; just got to use it for the first time yesterday.

It’s fantastic – really worth $150.

Saleae Logic Analyzer

Saleae Logic Analyzer

Now they have new versions that do analog, too (low-bandwidth, tho).

The nice thing about the Saleae thing is the software – it’s really amazingly simple and effective (you can download a demo from their website without the hardware).

I’ve used other logic analyzers – this is miles ahead. (Also way, way, better than the protocol decode on my new Rigol DS2072A DSO.)

https://www.saleae.com/logic

[No, they didn’t pay me anything to write this.]

Solar powered bike

I built a solar-powered bike. It works, but not quite as well as I’d hoped.

IMG_20130806_120725 copy

I started with a 2008 Currie “E-Zip Mountain Trailz” (sic; ugh) electric bike, which works pretty well.

That is powered by a pair of 12v 10AH SLA batteries, in series for 24 volts. I’ve always been afraid to ride for long distances for fear I’d run out of power before getting home. (The thing weighs 70 pounds, and I’m no athlete, so it’s painful to go up hills without power.)

I’d been thinking of putting solar panels on it to charge the batteries while I ride. I didn’t have any appropriately-sized panels around, so I didn’t do it until this summer, when I decided to try using a bike trailer to hold the panels.

The trailer solves the problem of the panels being shaded by my body when I ride, and also avoids problems with the weight of the panel hardware messing up the balance of the bike.

I have some 20 year old Siemens SM55 modules, rated at 55 watts (new, when pointed at the sun). These things are huge and heavy – 51 x 12 inches, and 12 pounds each (1300 x 330 mm, 5.5 kg). And since the eBike runs on 24 volts, I’d need 2 panels in series to charge the battery (at least without a DC-DC boost converter). That’s 24 pounds, not counting mounting hardware.

But, hey, with a trailer, who cares how much it weighs, right? And 110 watts is a lot of power – likely enough to completely power the bike while riding (on average, on a sunny day).

So I got a used bike trailer; $50 on Craigslist:

The bike trailer as I got it

The bike trailer as I got it (nylon roof & child seat removed)

I took off some of the trailer hardware to make it easier to mount the panels, and installed a plywood floor to make a storage compartment under the panels.

Then I used a couple of pieces of lumber to attach two panels together (at the ends), and mounted more lumber on the sides for mounting on the trailer. I cut slots to fit the trailer poles, and attached the panels to the trailer using standoffs and cable ties:

Cable tie straps hold the panels on

Cable tie straps hold the panels on

I also had to use more lumber to reinforce the trailer poles, which were only meant to hold a nylon sunshade (not 30+ pounds of panel hardware).

I was going to get a 24v charge controller to avoid putting too much voltage into the batteries, but I haven’t gotten around to that – I just wired the output of the panels (in series) parallel with the 24V battery; good enough for now.

Solar panel output wired in parallel with the battery

Solar panel output wired in parallel with the battery

"Watts-Up" meter is just used as a voltmeter. The venerable Garmin GPS V is also powered off the 24v system.

“Watts-Up” meter is just used as a voltmeter.
The venerable Garmin GPS V is also powered off the 24v system.

Finally, I made a bumper sticker to go on the back of the panel; it reads “CAUTION – HIGH CURRENT STAND BACK 500 MM” (just visible in the last picture below, if you zoom in). I figured that would keep the ignorant from messing with the bike (and it fits my skewed sense of humor).

So, how does it work?

It works. Mostly, sort of. As long as I’m riding in full sunlight I can go indefinitely if the road is level or not too steep.

I tried a test run riding to work – about 12 miles – on a sunny day.

I weigh nearly 220 pounds, the bike is 70 pounds, and the trailer with the panels is something like another 50 pounds. So the whole setup is maybe 350 pounds. That’s too much for the motor to pull up a steep hill without a lot of help from me.

I got to work OK and not too tired, in about 90 minutes (about 8.2 mph average – not at all impressive by road bicyclist standards). I did have to work my way up hills.

At work I got delayed and ended up going home close to dusk. I started out riding in the shade. Halfway home, I had a dead, dead battery and about 7 miles still to go. And 350 pounds to drag up each hill. After mighty struggles, I gave up and called for a ride home.

A week or so later, I tried the same trip on a light steel street bicycle (about 20 pounds, with narrow smooth tires and no suspension – in other words, efficient).

I got to work again in about the same time, only slightly more tired than with the electric bike. With the vastly lighter and more efficient bike, going up hills with that was no harder than with the solar bike (with the motor helping). And I was able to get home with no problem.

In the end, a simple street bike turned out to be just as fast, not much more effort to ride, and way more practical – it even works in the shade.

But it was fun to try.

CAUTION- HIGH CURRENT. STAND BACK 500 MM

CAUTION- HIGH CURRENT STAND BACK 500 MM

OpenSCAD is great stuff! (Part 2)

[This is Part 2 of this post; click here for the first part.]

OpenSCAD is an open-source (completely free) 3D solid CAD program; it works on Windows, Linux, and Mac OS X.

It calls itself “The Programmers Solid 3D CAD Modeller”, and indeed that’s what makes it special.

Unlike any other CAD system I’ve seen, OpenSCAD is driven entirely by a program-like script. That sounds like it would be a lot harder to use than a GUI-based CAD system – but it’s not! It’s much easier to use, with a much shorter learning curve. The scripts use a C-like syntax that will be instantly familiar to anyone who’s worked even a little with C or a C-derived braces-and-semicolon language (C++, Java, C#, etc.).

In 15 minutes with OpenSCAD, I was able to do far more than I could with AutoCAD or SketchUp after several hours – with a lot less frustration. If you have any background in programming at all, you’ll find it ridiculously easy to learn and use.

OpenSCAD has a simple but effective IDE, so you can try things interactively at the keyboard – just type some commands, mash F5, and see the result instantly. Once your 3D model is rendered, you can use the IDE to zoom in and out and look at your model from any angle.

OpenSCAD showing my modeled speaker set

OpenSCAD showing my modeled speaker set

What makes OpenSCAD great for engineering drawings is it’s ability to position and size things numerically – if you want a part exactly 3.75 inches to the left of another part, just subtract 3.75 from the x-coordinate of the part, and that’s where it will be. If you want a part to be tall enough to cover 9 other parts, just get the dimensions of the other parts, add them up (in your script) and feed the result in as the height value.

That way, if you resize one part of your model, all the other parts that depend on it for their own size and position automatically get adjusted to compensate. If you want something centered with respect to some dimension, just take the dimension and divide it by 2 to get the proper position!

None of this is “magic” performed by OpenSCAD – this is stuff done by you, in your own script (program), so it’s 100% under your control.

For example:

cube([w, h, d]);

Gives you a rectangular prism with the given width, height and depth. “w”, “h”, and “d” can be literals – so cube([1,4,9]); gives you a 2001-type monolith. Or they can be program variables, which you can pass to a module and whose values you can compute.

There are commands to translate, mirror, and rotate objects (or groups of objects), and you can assign colors and transparency to them (but not textures, yet anyway). All the basic arithmetic and trigonometry functions are there to help you compute sizes, positions, and angles. And you can construct objects by any combination of adding or subtracting primitives (rectangular prisms, cylinders, spheres, and polyhedrons).

Conditionals and iteration are available with C-like “if” and “for” statements, so you can write a “real program”.

One unexpected thing is that the compiler is somewhat primitive – all variable values are computed at compile time (not “run time”); this has to be kept in mind when writing scripts, but I didn’t find it a serious problem.

The OpenSCAD website has an excellent manual (by freeware standards) that explains all this, as well as a handy “cheat sheet” for quick reference.

So far, I’ve used OpenSCAD only for this one project, and that took just a few hours – most of the time was spent tweaking the design of my speaker case. (Unlike all the other CAD programs I tried, hardly any time was spent figuring out how the program works.)

However, I quickly found a few tricks worth mentioning:

module part(name, w, h, d) {
cube ([w, h, d]);
echo (name, w, h, d);
}

This defines a module (something like a function) called “part”, which I use to define each separate part I’ll have to cut out of plywood to assemble the speaker set. Each part has a name, width, height and depth, and when the part is rendered, it prints out (via the “echo” statement) the name and dimensions, so I get a automatically-generated “cut list” of parts to make.

For example, I have this code:

module base(x,y,z) { translate([x,y,z]) { part(“Base”, BaseW, BaseH, BaseD); } }

This defines a module “base” that will create the base of the speaker case, using the dimensions in the variables BaseW, BaseH, and BaseD. The x, y, z inputs to the module give the position where the base should be.

Later in my script, I call:

base(0,0,0);

Which creates the base of the speaker set, positioned at the origin of my coordinate space. It also prints the output:

ECHO: “Base”, 14.375, 0.75, 4.75

Which gives me the dimensions I need to cut to make the base. (The print formatting abilities of the script language are minimal, but adequate for this purpose.)

Here is the first part of my final script – it gives you an idea of how I calculated the dimensions of parts:

// Case for HelderHiFi amplifier, power supply, and speakers. 2013-03-27, nerdfever.com

// GENERAL CONSTANTS

slop = (1/16); // inches
PartAlpha = 0.5;

// COMPONENT DIMENSIONS

AmpH = 1.75;
AmpW = 2;
AmpD = 5;

SpeakerW = 4.5;
SpeakerH = 7.25;
SpeakerD = 4.5;

BatteryW = 3.5;
BatteryH = 2.75;
BatteryD = 4;

PowerW = 3.35;
PowerH = 2;
PowerD = 3.5;

// PARTS DIMENSIONS – INPUTS

Thick = 3/4; // for load-bearing base, top, supports
ShelfThick = 1/4;
StripThick = 1/8;

StripLip = 1/4;

TopW = 8.5;

PlateThick = StripThick;

// PARTS DIMENSIONS – CALCULATED

BaseW = slop + SpeakerW + slop + Thick + slop + BatteryW + slop + Thick + slop + SpeakerW + slop;
BaseH = Thick;
BaseD = max(max(max(AmpD, SpeakerD), BatteryD), PowerD) – 2*StripThick;

The idea here is that I’m allowing a “slop” of 1/16th inch – this is extra space beyond what is strictly needed per the component dimensions, to allow something for clearance and imperfect cuts.

Then I have the dimensions of the parts that need to fit inside the speaker case, and then the thickness of the plywood stock (3/4, 1/4, 1/8″) I’m going to use for different parts. Finally, from those I calculate the dimensions of the base – the width of the base is the sum of all the parts it has to hold, plus two “Thick” dimensions (for the vertical pillars), and slop around each of the parts. The base depth is calculated as the maximum of all the parts it will have to support, less “2*StripThick”, subtracting for retaining strips on either side of the base, which will be used to prevent the speakers from sliding off the base while being carried.

You can download my whole script here if you want to see it – I’m certain others have made vastly more complex and impressive things with OpenSCAD, but this shows what can be done after just a few hours of work.

When I run the script with F5, I get the rendered model:

Speaker set model. Grey boxes are speakers (translucent), blue box is amplifier. (Note the top, plus 1/8" lip around the speakers, prevent speakers from falling out unless carefully lifted.)

Speaker set model. Grey boxes are speakers (translucent), blue box is amplifier. (Note the top, plus 1/8″ lip around the speakers, prevent speakers from falling out unless carefully lifted.)

And this output:

Parsing design (AST generation)…
Compiling design (CSG Tree generation)…
ECHO: “Base”, 14.375, 0.75, 4.75
ECHO: “Long strip”, 14.625, 1, 0.125
ECHO: “Short strip”, 0.125, 1, 4.75
ECHO: “Pillar (less subtraction)”, 0.75, 7.625, 5
ECHO: “Pillar remove”, 0.25, 0.125
ECHO: “Pillar remove”, 5.875, 0.125
ECHO: “Pillar (less subtraction)”, 0.75, 7.625, 5
ECHO: “Pillar remove”, 0.25, 0.125
ECHO: “Pillar remove”, 5.875, 0.125
ECHO: “Shelf1”, 3.625, 0.25, 4.75
ECHO: “Shelf2”, 3.625, 0.25, 4.875
ECHO: “Power strip”, 3.625, 0.5, 0.125
ECHO: “Plate”, 5.125, 5.625, 0.125
ECHO: “Top”, 8.5, 0.75, 5
ECHO: “Clearance for speakers above lip”, 0.125
Compilation finished.
Compiling design (CSG Products generation)…
PolySets in cache: 15
Polygons in cache: 90
CGAL Polyhedrons in cache: 0
Vertices in cache: 0
Compiling design (CSG Products normalization)…
Normalized CSG tree has 21 elements
CSG generation finished.
Total rendering time: 0 hours, 0 minutes, 0 seconds

As you can see from the last line, this simple project renders nearly instantly.

From the cut list, I was able to go to my wood shop and cut out all the parts, ready to assemble:

Speaker set parts, per the cut list

Speaker set parts, per the cut list


I quickly piled the pieces together to see if they really fit with the components…

Front view. (Amplifier will go on top shelf.)

Front view. (Amplifier will go on top shelf.)

Back view.

Back view.


…and they did! Perfect on the first try!


Here’s the case part way thru assembly:

Case partially assembled.

Case partially assembled.


And the finished product, painted and wired up:


Front view.

Front view.

Back view.

Back view.

It sounds good, too.