
[Minor update 2020-09-06, larger update 2025-10 for BC5]
I use Beyond Compare a lot – every day. It’s the best “diff” utility I’ve ever found.
But I also need to compare Word documents a lot – also every day. And Beyond Compare isn’t very good at that.
Microsoft Word has it’s own “legal blackline” for tracked changes (sometimes called “redline”) compare which works well, but is very tedious to start each time. To use it (in Office 365), you need to:
- Open a document
- Go Review>Compare>Compare two documents
- Find the original document and select it
- Find the revised document and select it (yes, even tho you already have it open)
- Click OK
If, as is often the case with me, the two documents are in different folders, this is a lot of work.
With Beyond Compare, on the other hand, you can just select two documents in File Explorer, and right-click on “Compare”. Done.
Here’s a way to get Beyond Compare (BC) to launch Word’s legal blackline, the same easy way. Step-by-step:
1 – Put script “diffword.ps1” into the BC5 settings folder (usually “%appdata%\Scooter Software\Beyond Compare 5”)
(That file is based on an idea I found at https://github.com/ForNeVeR/ExtDiff – many thanks to the author of that!!)
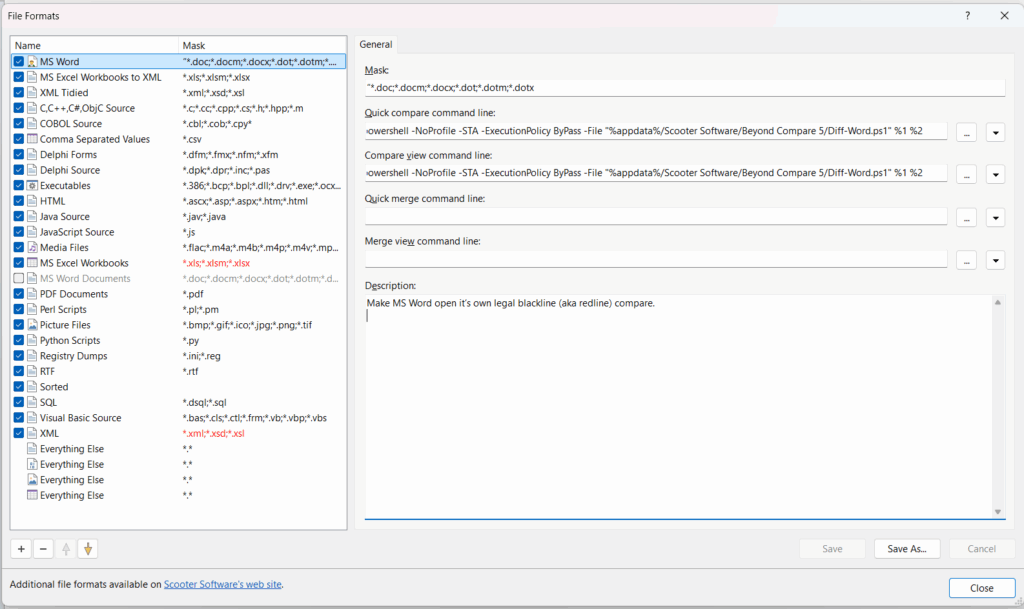
2 – Open Beyond Compare and do Tools>FileFormats… Uncheck any pre-existing “MS Word Documents” setup under the Name column on the left.
3 – Go to the bottom of the window that pops up and click ‘+’, then choose “External Format”.
4 – In the Mask box paste in “*.doc;*.docm;*.docx;*.dot;*.dotm;*.dotx” (without the double quotes).
5 – In the Quick compare command line box paste in (again without the double quotes): “powershell -NoProfile -STA -ExecutionPolicy ByPass -File “%appdata%/Scooter Software/Beyond Compare 5/diffword.ps1″ %1 %2”
6 – In the Compare view command line box paste in exactly the same thing (again without the double quotes): “powershell -NoProfile -STA -ExecutionPolicy ByPass -File “%appdata%/Scooter Software/Beyond Compare 5/diffword.ps1″ %1 %2”.
7 – In the Description box paste in (if you care): “Make MS Word open it’s own legal blackline (aka redline) compare.”
8 – Click Save
9 – The new file format should be at the very top of the list on the right (in case of more than one setup in this list, Beyond Compare uses the first one in the list). Just to make it look clean, right-click on the name of your new format and change the name to “MS Word”.
The window should look like this:
To use it:
1 – Right click on the ORIGINAL file and choose “Select left file for compare”.
2 – Right click on the REVISED file and choose “Compare to”.
You can also just select two Word files with File Explorer (drag the mouse around them, ctrl+leftclick on each, or shift+click). Then right-click on the ORIGINAL document and say “Compare”. (Whichever document you right-click on Word considers the original.)
That’s it. This will open a Word window with the blackline change marks (revised marked against original).