
Posting here because I couldn’t find any instructions online, and I figured it out. I use the CF-33 because it’s one of very, very few laptops with a daylight-visible display.
I opened up mine (a Mk1) was because my touchscreen went crazy – the mouse position jumped around, and the mouse clicked at random when it’s not supposed to. Disabling it in Windows only worked until the next boot – it re-enables itself (not supposed to, but it does).
[Note: I haven’t tried it, but I’ve read that disabling the touchscreen in “Panasonic PC Hub” works on some Toughbooks (I don’t know if it works on the CF-33). You might want to try that first if that’s your problem.]
So I wanted to disconnect the touchscreen by unplugging the internal cable – the machine also has a touchpad and I normally use a Bluetooth mouse anyway. Here’s how I did it, and how you can open up yours.
General tips:
1 – Don’t force anything.
2 – You can run the machine without batteries in it, and without the dock/keyboard – just plug in the AC cable. If you want to work it once the touchscreen is disconnected or without the dock, I suggest a USB mouse and/or keyboard (if you want both you’ll need a USB hub – without the dock there’s only one USB socket).
3 – I highly recommend using a set of JIS screwdrivers (not Philips). The screws look like Philips but they’re JIS which are slightly different and if you use a Philips screwdriver you can easily strip the heads. This is the best set I found at a reasonable price: https://www.amazon.com/VESSEL-precision-screwdriver-set-TD-56/dp/B000CED236 They’re Japanese made and incredibly good quality – $14.
4 – Try to avoid pressing the power button when fiddling with it while it’s running. Esp. if it starts a Windows Update and says “don’t turn off your computer”. I managed to press it, but it restarted the update on the next boot so I guess it’s not critical all the time. Or I was lucky.
5 – The CF-33 won’t display anything if the battery door is open. If it seems like it should be running and the battery door is open (or removed), that’s what’s going on.
6 – Put screws back in the holes they came from after removing parts. This will help you remember where they go.
Open the battery door, take out the batteries. It’ll look like this:
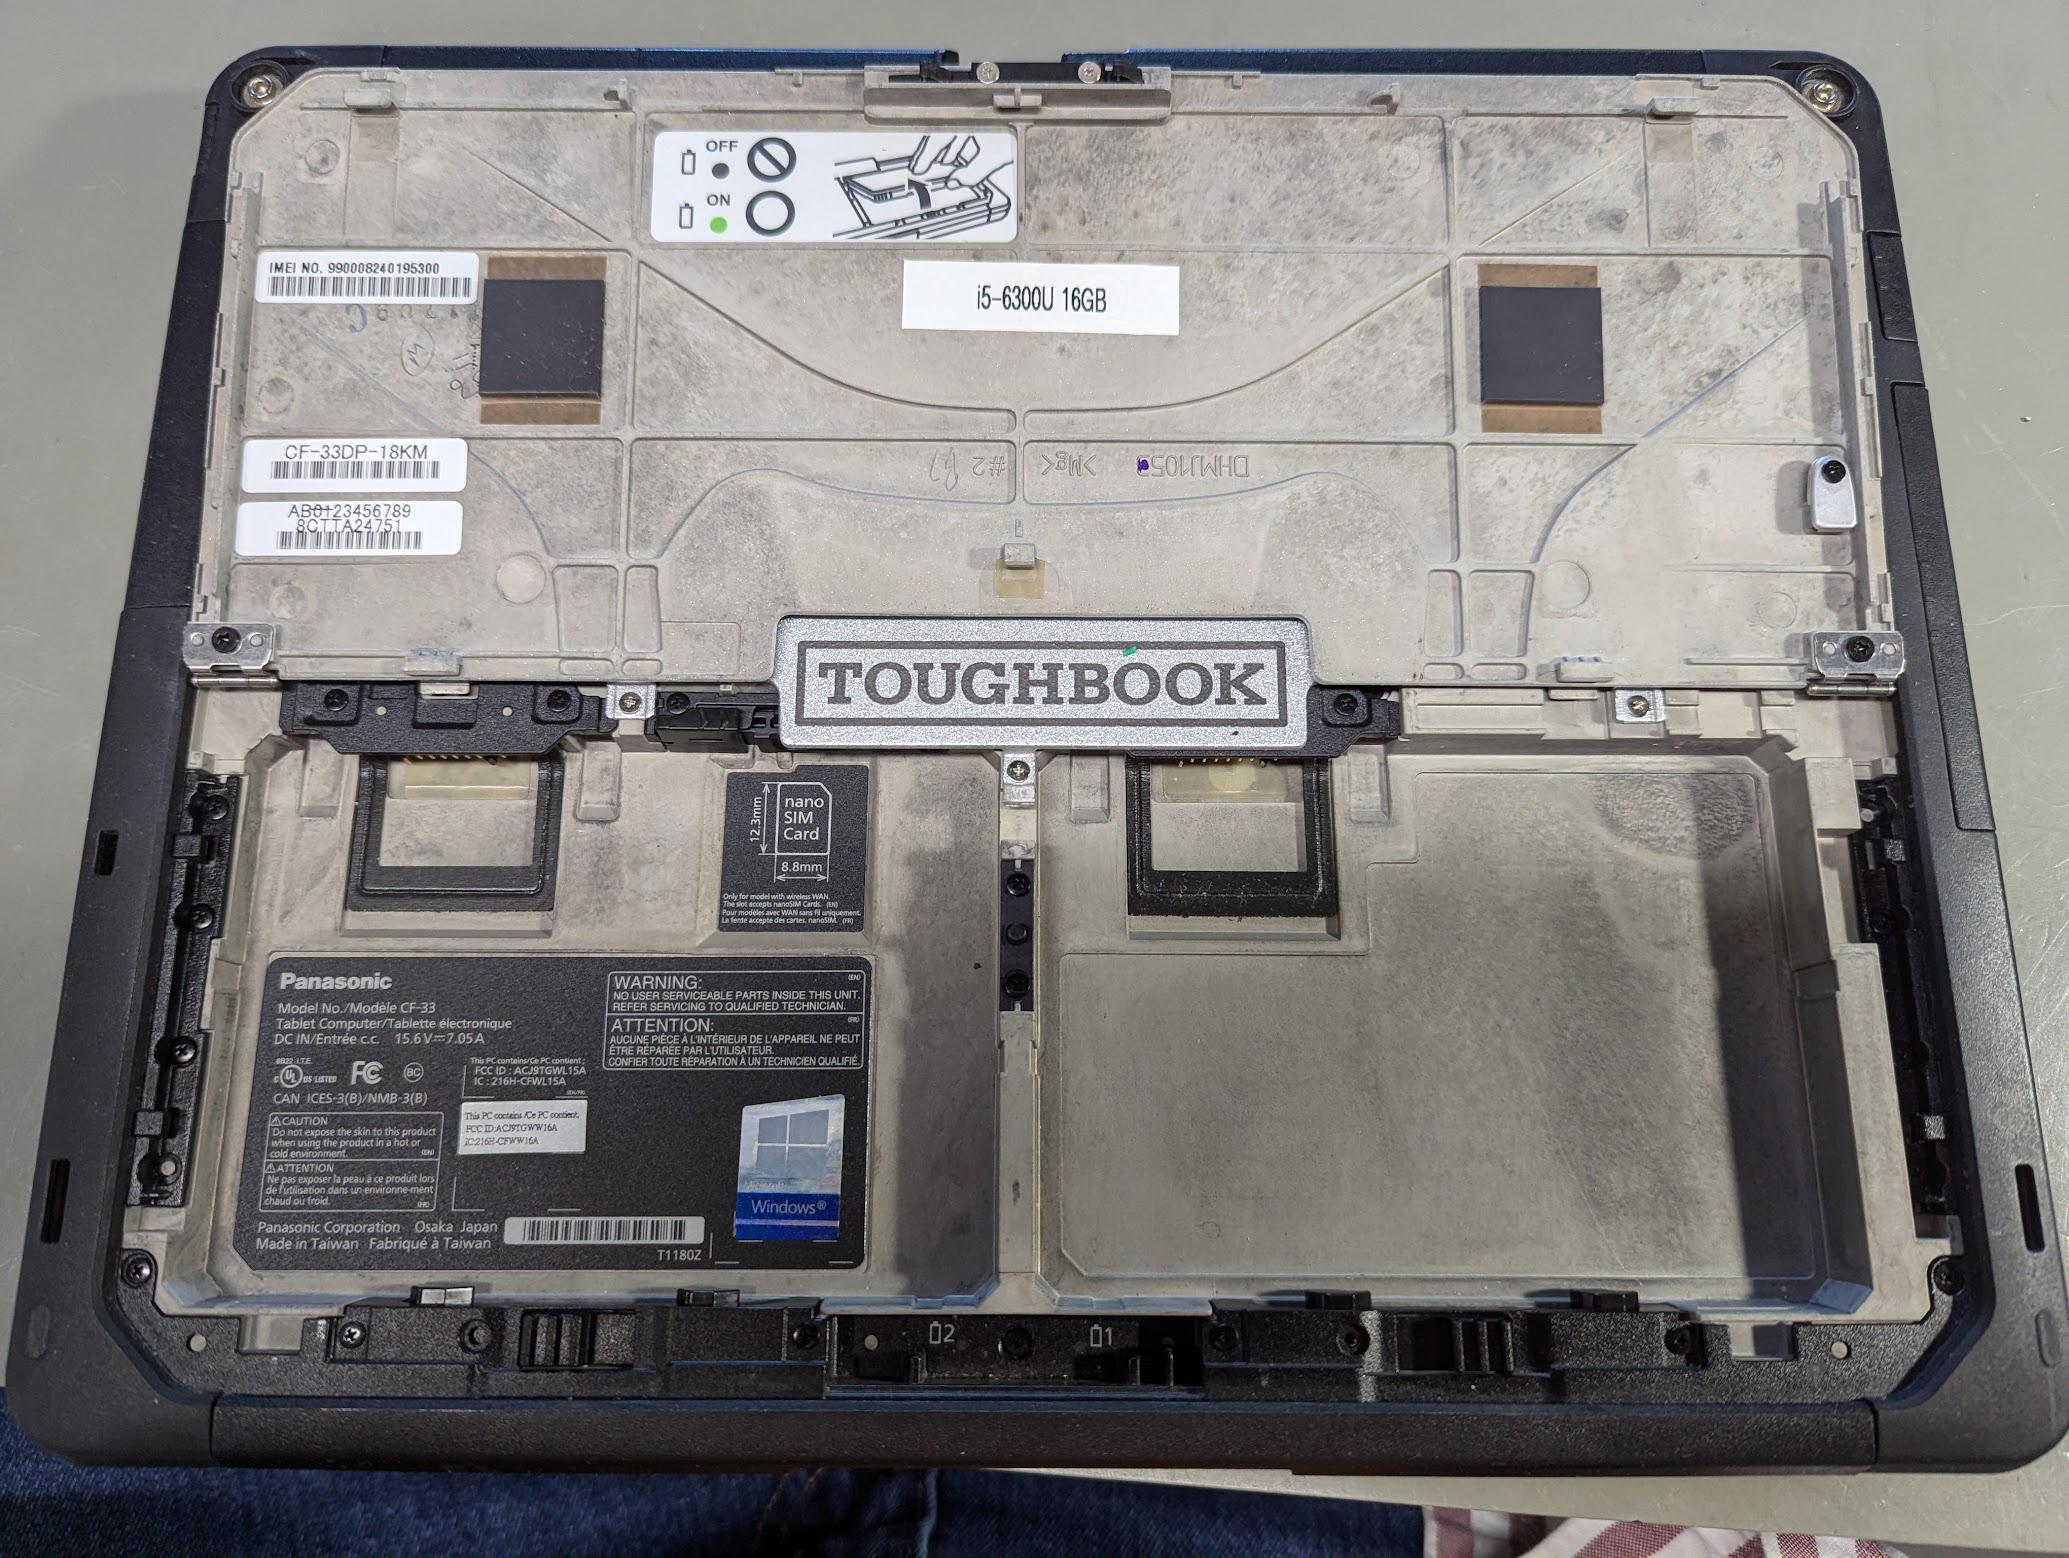
Inside the battery compartment (per that photo), there’s a small metal tab (looks like aluminum to me) held by one screw on the right, just 3/4 of an inch north of the right battery. That’s how the machine senses if the battery door is open. If that metal tab isn’t next to the sensor underneath (when the door is closed), the machine will run but the display will not operate. (The black plastic spring loaded plunger in the middle that looks like it has a switch to detect if the door is open has nothing to do with it. That is just there to push up the battery door once you unlatch it. It has no electronics.)
Remove the 3 sliver screws on the silver plate that covers the other side of the CF-33 and stick out into the battery compartment. Then you can take off the plate that covers the other side (not covered by the battery cover) of the CF-33. This is the silver outside plate that surrounds the back camera and says Panasonic and TOUGHBOOK on it.
At this point you’ll see a door that can be removed by taking out a bunch of screws. The door contains the rear camera. I don’t know if you need to remove it or not (I did). The purpose of the door seems to be to allow upgrades – under the door are two radios (cellular and Bluetooth/Wifi) and I think this is where the fingerprint reader goes (I don’t have one).
Once you get the door off, disconnect the rear camera cable by flipping up the black latch at the end of the cable by 90 degrees (these open at the end where the cable goes), to make it stand up from the PCB. Slide out the cable, put the black latch back down.
Next to the fan you’ll see a silver door with 3 screws – that holds the SSD. No need to mess with that (the SSD will be exposed in the next steps anyway).
Now remove the 4 silver bumper button things on the corners opposite the docking connector. (Two on each side of the machine.) You need a hex driver – I think it’s 2mm but I used a 3/32 inch and it mostly worked ok.
Next remove all the screws around the edges of the machine holding in the black plastic/rubber edges. Then remove the rubber edges – first from the short sides of the machine, then from the long sides (the order matters). Then remove all the screws around the perimeter of the machine. You also need to remove the two screws left and right of the fan (in deeper holes).
Once you get all those out, the cover should be loose around all the edges but stuck in the middle. It’s held by the SIM card socket. Take out the one screw holding the SIM card socket PCB and slide it out. Then you can take off the cover. (It’s possible if you don’t have a SIM card in there this isn’t necessary.)
Here’s what it looks like once you get the cover off:
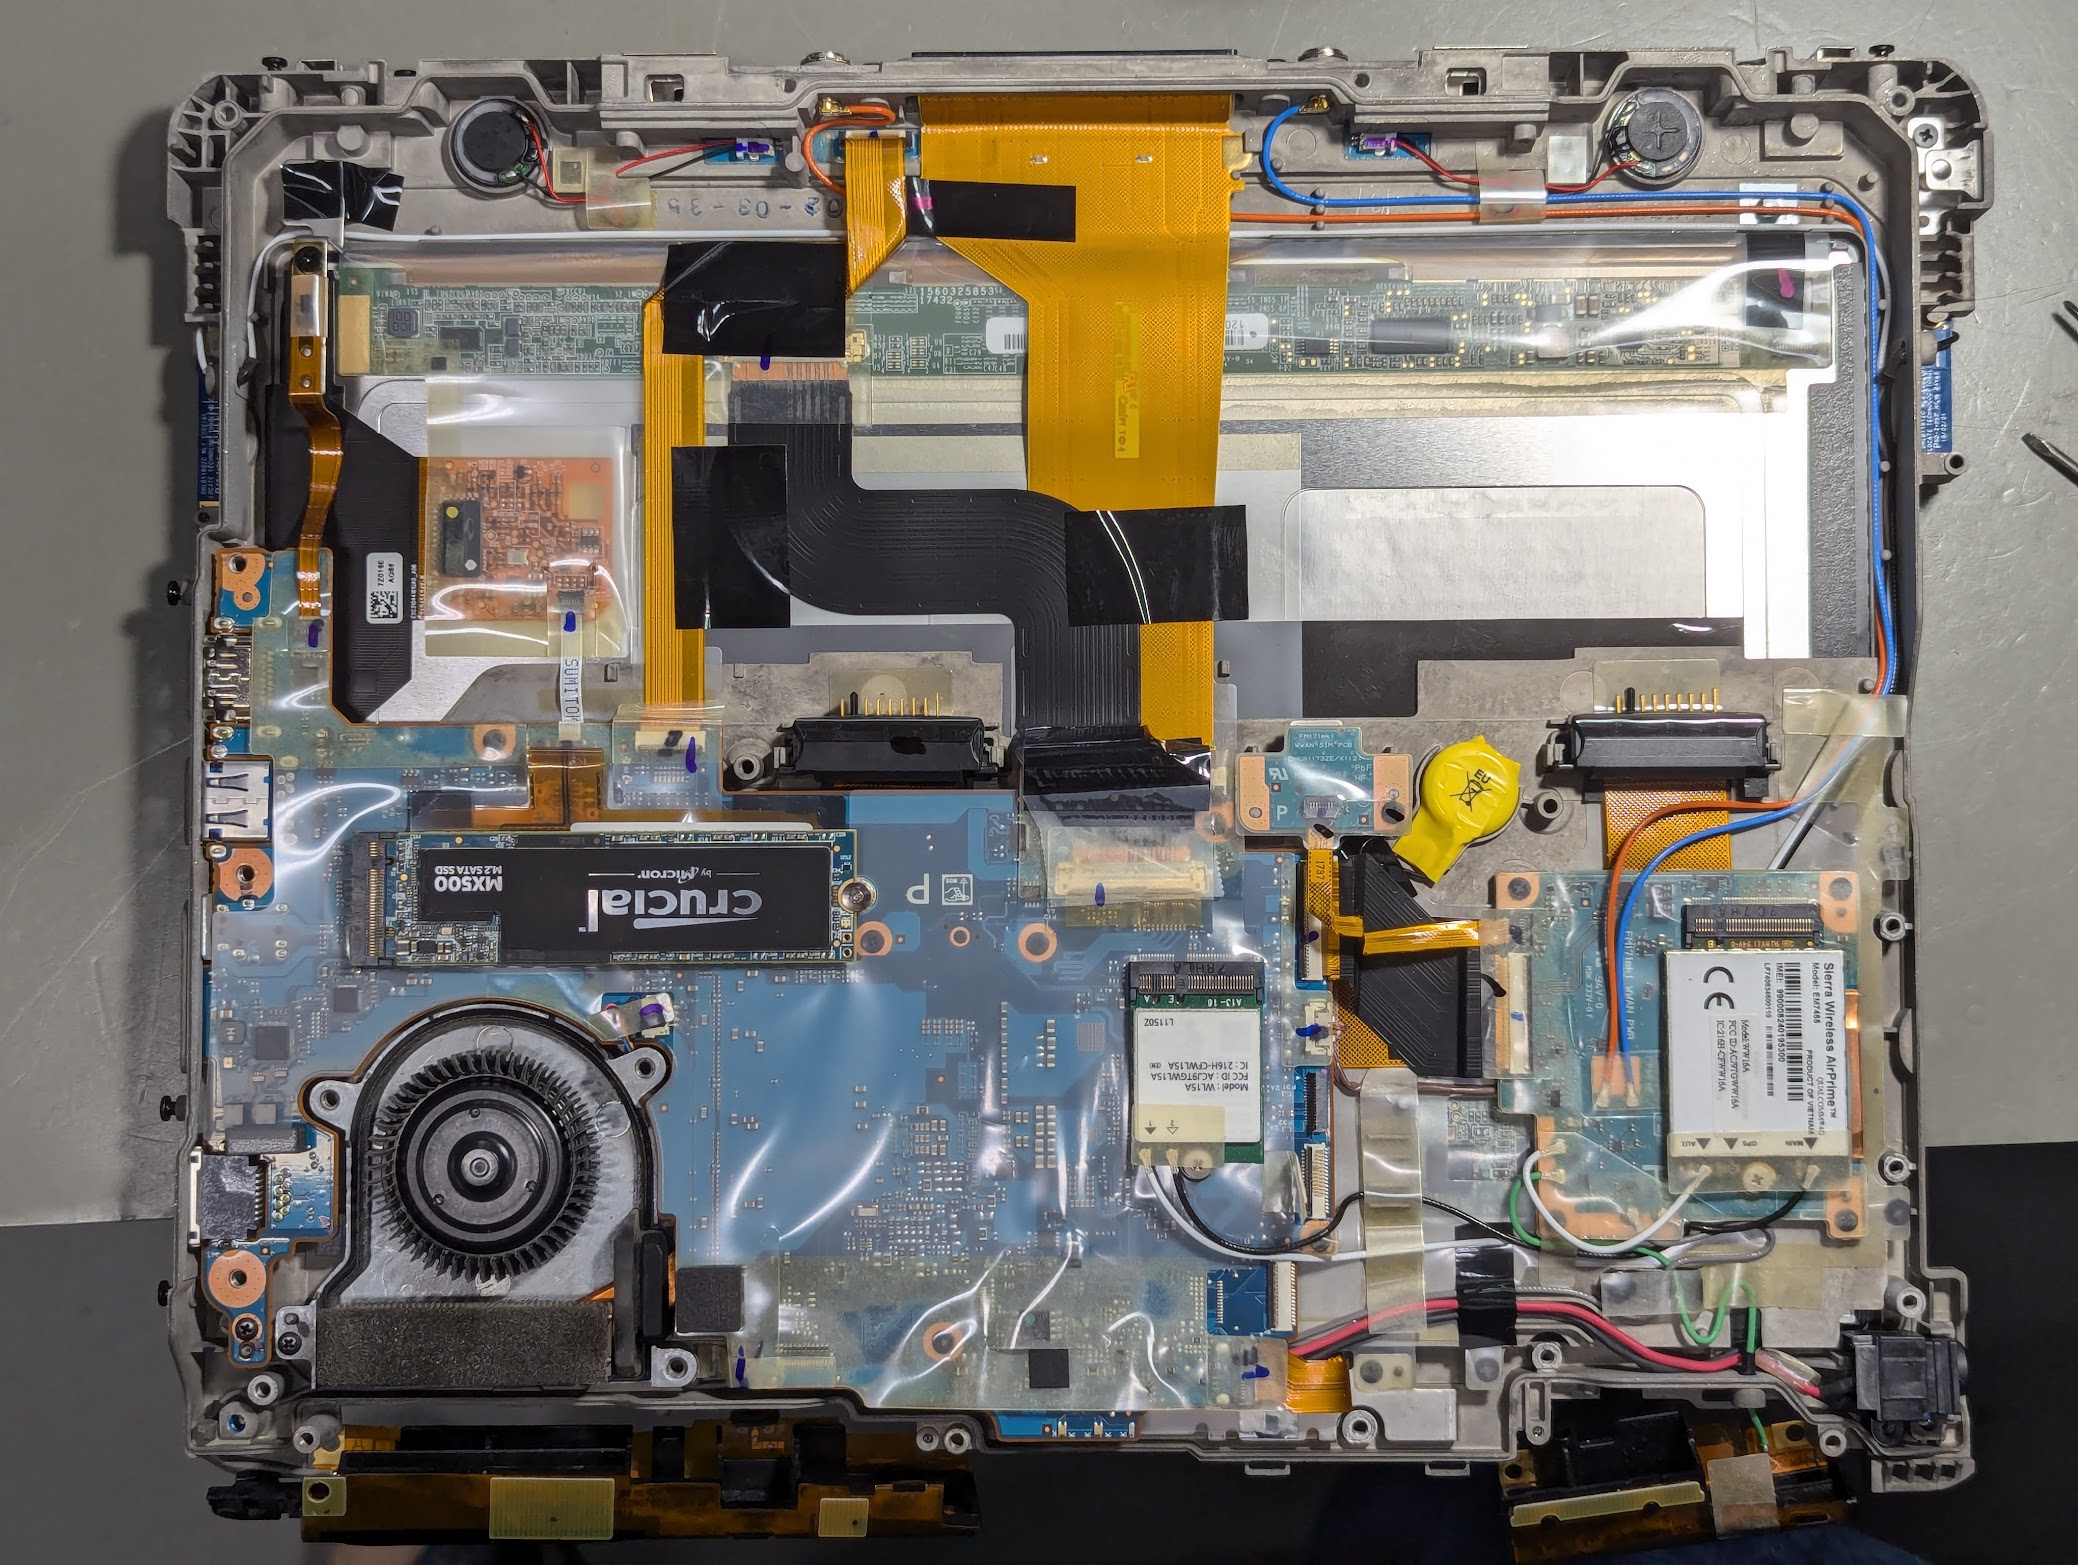
The touch screen cable is the little white one (about 5 or 6 contacts) that is perpendicular to the SSD. On the opposite side of the SSD from the fan. In the photo it says SUMITOMO on it.
Lift up the plastic protecting it (in the area with the blue marker in the photo) and flip up the black latch at the end of the cable by 90 degrees, to make it stand up from the PCB. Slide out the cable, put the black latch back down. If it takes much force you’re doing it wrong.
That disconnected the touch screen.
Now reassemble the whole thing in the opposite order.
Getting the mainboard cover on is tricky because (again) the SIM card socket is in the way. Don’t try to remove the plastic bracket – you don’t need to and it resists. Instead, remove the SIM card (if you have one in there), remove the one screw holding the PCB and put the cover on. Then slide the SIM PCB into place and replace the screw. Then put the SIM back in and close the little door.
There are 5 screws that are longer than the others. Two of these go thru the black plastic shell that holds the pen, then thru the smaller cover, then into the main machine. 2 more go on either side of the docking connector. I don’t know where the last one goes.
Once you get it all together everything works except the touch screen (which got disconnected). But the touchpad still works (as does any mouse you connect).
I hope this helps someone.